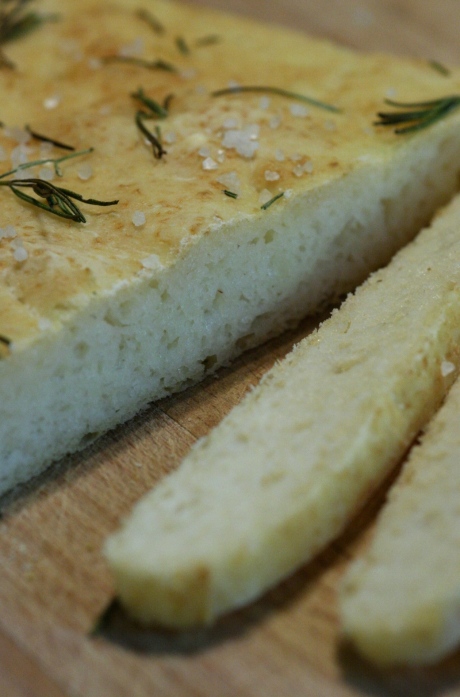
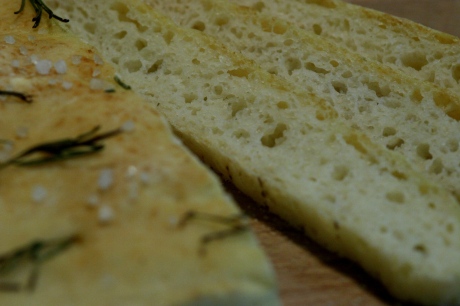
gluten-free and dairy-free white crusty bread

I can’t leave gluten-free bread alone. It sounds obvious to say, but I really just want to get it as close to the ‘real thing’ as I can. The brands you can buy have got a lot going for them: they’re light, they remain reasonably fresh and they’re hassle-free. What I don’t like about them, and some brands are more guilty of this than others, is that they tend to dissolve into a gluey mass in your mouth and get stuck in your molars. Oh, not to mention the fact that they’re almost £3 a loaf… I tend to alternate between buying loaves (the M&S loaf is my very favourite, followed by Sainsbury’s own brown multi-seeded and then, if there’s nothing else, Genius multi-seeded) and baking my own.

I can’t get along with the white loaves though. Not only do they have the aforementioned faults but they also have a sweet aftertaste which I find very cloying. Oh, and I suspect that a piece of cardboard would have more nutritional value. So, if I want white bread, I tend to bake my own. I was ecstatic when I discovered psyllium husk several months ago and I’ve been experimenting with it to work out the optimal amount: too much, and the bread can have a bit of a clammy texture. I’ve managed to cut down on the amount considerably, so much so that I’m going to rework some of my previous bread recipes on here to get them as best as they can be.

Something else I’ve noticed with homemade gluten-free bread, is that it takes much longer to toast than commercial brands and there’s always a loud sizzling noise emanating from the toaster. To reduce this, I’ve subbed dried egg white for the fresh one I usually use. I used Dr Oetker which is available in large Tesco stores. A big improvement, I think.

gluten-free and dairy-free white crusty bread 2

Gluten-free and dairy-free crusty white bread

Makes 1 small loaf

1 tsp psyllium husk
1 tbsp cold water
140g + 40g gluten-free plain (all-purpose) flour
75g + 25g potato flour
12g tapioca flour
4g powdered egg white (half a sachet, equivalent of 1 egg white)
2 1/2 tsp caster sugar
1 1/2 tsp gluten-free baking powder
1 heaped tsp fast-action yeast
1/4 tsp Vitamin C
250ml cold water with 1 tsp of salt dissolved
1/2 tsp xanthan gum
Olive oil

You will also need an electric whisk and a 1-lb non-stick loaf tin.

Begin by placing the psyllium husk in a small bowl or mug with a tablespoon of cold water. Give it a stir and leave it to one side whilst you weigh out all the other ingredients.

Sift 140g of gluten-free plain flour, 75g of potato flour, the tapioca flour, powdered egg white, caster sugar, gluten-free baking powder, fast-action yeast and Vitamin C into a large mixing bowl.

Give the psyllium husk a good stir (it should have become jelly-like). Add this to the mixing bowl, along with the salted water. Whisk with an electric hand whisk for several minutes until the mixture is light and bubbly. Sprinkle the xanthan gum over the top and continue to whisk for another couple of minutes. The mixture will thicken up considerably (watch out that the mixture doesn’t crawl up the beaters and foul up the motor of your whisk).

Sift in the remaining 40g of gluten-free plain flour and 25g of potato flour. Fold in with a metal spoon until thoroughly combined. Pour into the loaf tin, smooth the top with a palette knife and cover with an oiled piece of clingfilm (plastic wrap). Leave in the fridge overnight.

Remove from the fridge about three hours before you wish to bake it. (It should have started to rise slightly). Leave to rise at room temperature then remove the clingfilm.

Preheat the oven to 220°C (I used my top oven which is a conventional oven, so adjust the temperature accordingly). Place a roasting tray at the bottom of the oven to heat up. Before putting the loaf in the oven, throw half a glass of water into the roasting tray to create steam. Bake the loaf for 10 minutes, then reduce the temperature to 200°C and continue to bake for another 30 minutes, or until the top of the loaf is domed and dark golden brown and the base sounds hollow when tapped with your knuckle.

Leave to cool COMPLETELY before slicing (this can take a couple of hours).

gluten-free apple crumble

I don’t know where March has gone. I had lots of big ideas for recipes for this month and I haven’t managed to get any of them on the blog. I’m still tinkering with my bread recipe…and I think I probably always will be until it’s just like the glutenicious variety (!) I’ve been trying to reach the optimal level of psyllium husk so that there’s enough to get a good rise, but yet not so much that it has a clammy texture. I’m also playing around with a butter shortbread recipe and I think my remastered puff pastry sausage roll recipe is ready to be unveiled to the world very soon. But what with three birthdays (my own included), visiting family, a christening, looking after the house, trying to keep up with my toddler’s busy social life and experimenting with some recipes that I need to faff a bit more with, I haven’t managed to blog anything apart from my monthly recipe for LiveGlutenFree:

gluten-free chocolate fondants

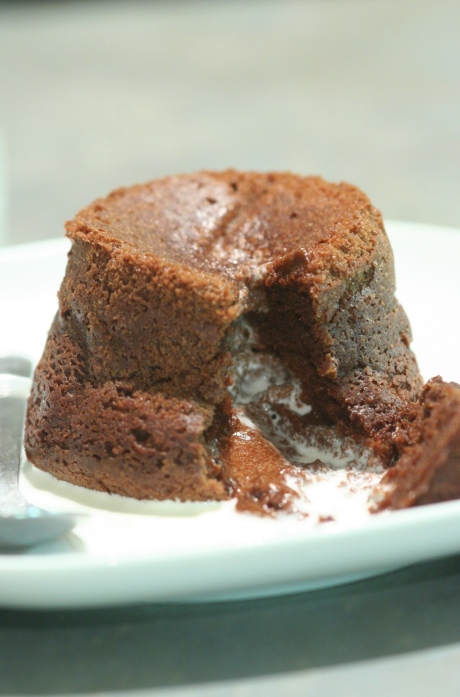
Gluten-free chocolate fondants

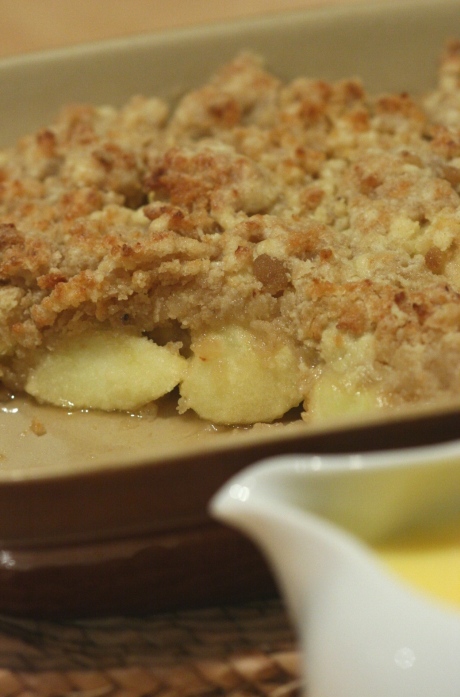
So here is something I’ve been meaning to try for ages: an improved apple crumble recipe. I’m very partial to an apple crumble, especially if it’s served with lashings of hot custard, but I have been less than impressed with the bog- standard gluten-free variety that uses a like-for-like flour substitution. The finished product is always very powdery and tends to go a bit gluey in the mouth. One way of getting round this is to sub some of the flour/butter/sugar combo for crushed biscuits which I do when I’m making my delicious pear and ginger crumble.

Oats are often added to crumbles to give them a bit of ‘bite’ but, unfortunately, I’m unable to eat even gluten-free oats. Enter rice and buckwheat porridge flakes (available from Sainsbury’s). I think they’re really useful and that they have a not un-oaty flavour. They are, however, very hard and you can’t just substitute them for oats without softening them up first. I usually do this with hot apple juice. I made this last night for my family and it all disappeared. It’s not really the Easterlicious treat I was planning (improved hot cross buns) but it was yummy all the same.

gluten-free apple crumble 2

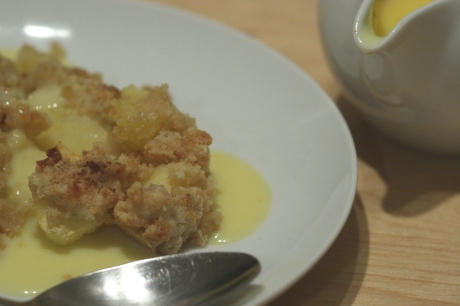
Serving suggestion: Gluten-free apple crumble with lashings of hot custard

Gluten-free apple crumble with rice and buckwheat flakes

Serves 4 generously

60ml apple juice
120g rice and buckwheat porridge flakes (I used Sainsbury’s)
120g gluten-free plain (all-purpose) flour
2 x 60g butter
2 x 60g light brown soft sugar + 2 tsp
400g apples (I used eating, rather than cooking, apples)

You will also need an approximately 1.3l-capacity ovenproof dish.

Preheat the oven to 180°C (my oven is fan-assisted so adjust accordingly).

Heat the apple juice in the microwave on ‘high’ for 1 minute. Combine with the rice and buckwheat flakes in a small bowl. Stir and set aside.

Sift the gluten-free plain flour into a large bowl and rub in 60g of butter until you have the texture of coarse breadcrumbs. Stir in 60g of light brown soft sugar.

In a small saucepan melt the remaining 60g of butter with the remaining 60g of light brown soft sugar over a low heat. When melted, pour over the rice and buckwheat mixture and stir to combine. Allow to cool slightly.

Peel, core and chop the apples into large chunks. Place in the base of the ovenproof dish and scatter 2 teaspoons of light brown soft sugar over them.

Combine the rice and buckwheat mixture with the flour and butter mixture and scatter over the top of the apples. Bake for 25 minutes or until the crumble topping is golden and the apples are tender. Serve with cream, ice cream, yoghurt or custard.

gluten-free chocolate chip cookies

I’ve just spent a fascinating ten minutes having a metaphorical ramble through the online Oxford dictionary. I am a bit of a word nerd – I love language and etymology and I was musing on the words “cookie”, “biscuit” and “scone” and the differences between them. “Cookies” have been imported into the British lexicon from the American (originally from the Dutch, meaning “little cake”) but, to us, the word denotes a particular type of chewy biscuit containing chocolate chips. When I was growing up, “cookies” weren’t as prevalent as they are today. We ate “biscuits” – the biscuit barrel would contain an array of Mr McVitie’s finest digestives, rich teas, fig rolls, custard creams, bourbons and, the ones that always got left, half-broken and woebegone in the bottom, Garibaldis or “squashed fly” biscuits as they were commonly known (Yuk. They still make me shudder).

Anyway, my summary of my lesson courtesy of the Oxford dictionary is that: cookies are biscuits and biscuits are scones. Unless you’re Scottish – then they’re buns. Cookies, that is, not biscuits. Clear? Good!

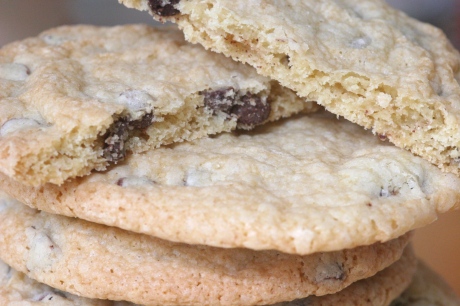
I’ve been fiddling with this cookie recipe for quite a while. We’ve had to munch our way through quite a few clumps of melted chocolate chips surrounded by congealed puddles of over-cooked, crackly butter and sugar. Then I decided to add extra tapioca flour to the mix which is excellent if you want to add a chewy texture to your baking…and chewy is exactly what you want with a cookie. I used dark chocolate chips but you could use milk or white or any combination of the three.

I think the traditional American way to eat these would probably be accompanied by a glass of milk but that’s not something I’ve grown up with, so we eat ours with a nice cup of tea. How very British.

gluten-free chocolate chip cookies 2

Gluten-free chocolate chip cookies

Makes 12 large cookies

115g butter, softened
80g light brown soft sugar
80g caster sugar
1 egg
1 tsp vanilla extract
175g gluten-free plain (all-purpose) flour
30g tapioca flour
1/4 tsp bicarbonate of soda
1/4 tsp salt
100g chocolate chips

You will also need 1-3 baking (cookie) sheets lined with baking parchment*.

Preheat the oven to 170°C (my oven is fan-assisted, so adjust accordingly). In a large bowl, cream together the butter and the two sugars until light and creamy (I used an electric hand whisk). Whisk in the egg and vanilla extract. Sift in the plain flour, tapioca flour, bicarbonate of soda and salt. Beat to combine until you have a soft and sticky dough. Stir in the chocolate chips.

Using well-floured hands, take 50g portions of the mixture and form into patties, about 1cm deep and 6cm across. Place one in each of the four corners of the baking sheet. Continue until all of the dough is used up. Bake for 11 minutes or until golden and spread-out. Leave to cool on the baking parchment and remove with the aid of a palette knife. Don’t try to remove them until they are cooled or they will crumble.

* I only have two baking sheets, so I baked the cookies in two batches.

gluten-free egg-free fat-free soft flour tortillas

our-growing-edge-badgeI was recently invited by Genie over at the blog Bunny. Eats. Design. to take part in a monthly event she is hosting called Our Growing Edge. Genie describes Our Growing Edge as the part of ourselves that is still learning and experimenting and the aim of this food-related event is to encourage us to challenge ourselves by trying new things. I was very pleased to be invited: as I told her, nearly every time I set foot in the kitchen, I have a challenge of one sort or another facing me! Do check out her round-up of all the entries at the beginning of next month and see what everyone else has been up to. You never know, it may inspire you to try something new as well!

These soft flour tortillas seemed perfect for this challenge. Tortillas are so versatile: they are relatively quick to make, especially if you’ve run out of bread; they’re perfect for making a wrap if you just want a snack at lunchtime but you can also make them into something more substantial, like fajitas or burritos, for an evening meal.

There was just a slight problem though: it was difficult to get them to be both flexible AND soft… oh, AND I wanted to do all this without egg because my mum can’t eat egg whites and I wanted to make something she could eat as well.

I thought my prayers had been answered when I discovered psyllium husk. Psyllium helps to add some much-needed elasticity which is missing from gluten-free flour. What makes gluten so beautiful, and yet so evil all at the same time, is its ability to mimic bubble gum in its uncooked state and then, by some quasi-alchemical process, turn into cotton wool once cooked.

Unfortunately, psyllium husk hasn’t made this pact with the devil: any elasticity it adds in its uncooked state can become somewhat rubbery when cooked if too much is used. And that’s what my first attempt at these was. They rolled beautifully but they also gave your jaw a great workout whilst chewing your way through them.

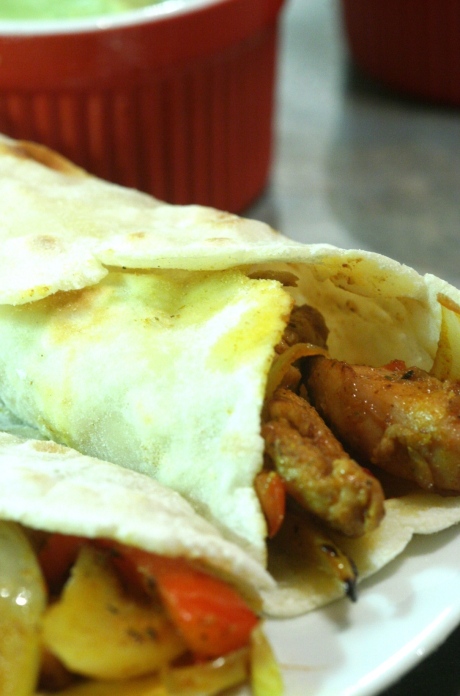
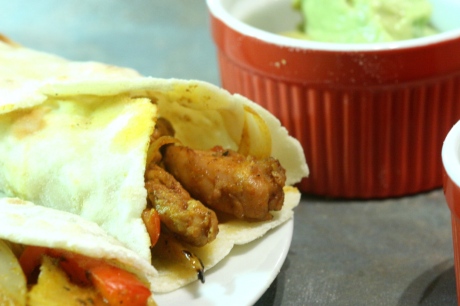
Then, I had a brainwave: what about mashed potato to add some softness? So I tried it…and it worked! We ate these this evening as chicken fajitas with guacamole, salsa and spicy beans and rice. Delicious.

gluten-free egg-free fat-free soft flour tortillas 2

Serving suggestion: Gluten-free chicken fajitas served with guacamole and salsa

Gluten-free, egg-free and fat-free soft flour tortillas

Makes 6 medium tortillas

1 tsp psyllium husk
3 tbsp cold water
90g cold mashed potato
110 gluten-free self-raising flour
50g potato flour
25g tapioca flour
1/2 tsp salt
1/2 tsp xanthan gum
100g fat-free natural Greek yoghurt (I used Total 0%)

You will also need 6 x approx. 25cm squares baking parchment and a large, non-stick frying pan (skillet)

Put the psyllium husk into a small bowl or mug with 3 tablespoons of water, give it a good stir and set aside whilst you measure out the rest of the ingredients. The psyllium should now be gloopy.

Put everything into the bowl of the food processor. Blitz it until the mixture comes together in one ball of very sticky dough.

Dust your hands with flour and divide the mixture into 6 equal balls (they should be about 70g each). Liberally dust a square of parchment with flour and place a ball of dough in the centre. Using the heel and blade of your hand, gently flatten the dough into a circle, a couple of millimetres in thickness. Then finish it off with a rolling pin until it’s about 1mm in diameter. Prick all over with a fork. This will help to prevent the tortilla from puffing up with air when it’s in the frying pan. Make the remaining tortillas in the same way. These can now be stored in the fridge, stacked and covered with clingfilm until ready to use – although I think they are better cooked from fresh.

Place your frying pan (skillet) over a moderately high heat. When the pan is hot, balance the tortilla, still on its parchment, on the palm of your hand and carefully flip it into the pan. Peel off the parchment from the top of the tortilla. When the tortilla is browned and blistered on the bottom (a couple of minutes), toss it or flip it over with a palette knife and toast the other side.

gluten-free and dairy-free orange and almond biscuits 2

I’ve had a jar of ground almonds in the cupboard for some time and I’ve been wondering what to do with them. I’ve used them before in my gluten-free and egg-free double-mint-choc-chip brownies, but I fancied something a little different. So, they’ve just sat there. And sat there. And sat there… 

Last week, we arranged for some friends to come round for afternoon coffee. I always bake something when people come round for coffee. (Hey, who am I kidding? I always bake something, whether people come round or not…!!!!) But this time it was a little more challenging. Not only did it have to be gluten-free for me (and, coincidentally and unbeknownst to me at the time, also for my friend’s wife!) but it also had to be potato-free. In the normal scheme of things, this wouldn’t be a problem. Potatoes don’t figure hugely in the world of cakes and biscuits… Unless you’re gluten-free, and then they figure massively, as one of the main constituents of gluten-free flour blends is, of course, potato flour (starch).

I could have faffed about making up a blend without potato flour because I have a veritable array of flours in the cupboard but I’m not sure of the ratios of flours to starches in commercial flour blends, I was out of cornflour (cornstarch), and didn’t think a large proportion of tapioca flour (starch) would be wise. Then I remembered the ground almonds in the cupboard and it all fell into place.

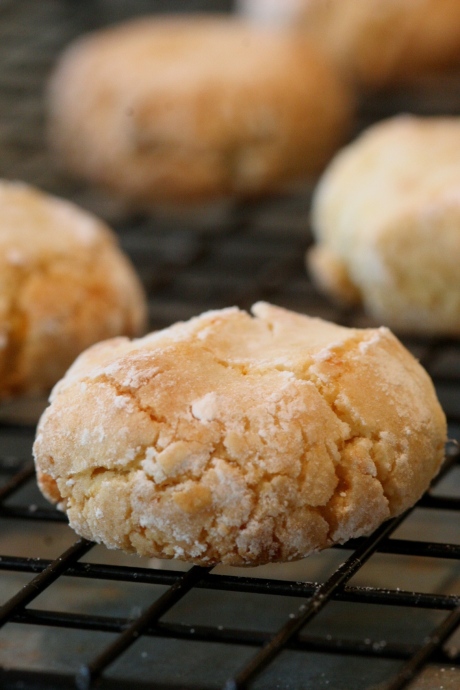
And so these gluten-free and potato-free orange and almond biscuits were born. They also have the added bonus of being dairy-free as well. This recipe uses a tiny amount of flour – I used rice flour – but if I were to make them again and didn’t have the potato-free condition, I would use a plain (all-purpose) blend.

gluten-free and dairy-free orange and almond biscuits

Serving suggestion: gluten-free and dairy-free orange and almond biscuits with a cappuccino and the Sunday papers

Gluten-free orange and almond biscuits

These biscuits are beautifully light and moist: the almond and orange flavourings are subtle, warming and aromatic. They look delicious served with a light dusting of icing sugar (which I forgot to do before I took the pictures – doh!) You need a very light hand when mixing the dough because you don’t want to knock all the air out of the egg whites. It’s sufficient to mix only until the egg white has disappeared and you are left with a lumpy, crumby mixture.

Makes 10-12 biscuits

90g ground almonds
45g icing (confectioner’s) sugar + extra for rolling and dusting
1 tbsp rice flour or gluten-free plain (all-purpose) flour
Zest 1 large orange
1 egg white

You will also need an electric whisk and a baking (cookie) sheet lined with baking parchment.

Preheat the oven to 200°C.

Place the ground almonds in a mixing bowl and sift in the icing sugar and the rice flour. Give it a swirl with a balloon whisk and add the orange zest. Gently rub in the orange zest with your fingertips to evenly distribute it throughout.

Whisk the egg white in a scrupulously clean bowl until it reaches the stiff peak stage. Add this to the almond and sugar mixture and gently stir in with a metal spoon. Don’t over-mix but stop when the egg white has disappeared even if you do not have one ball of dough.

Using your hands, form small balls of dough, with a diameter about the size of a 10p piece. Roll the balls gently in the extra icing sugar, place on the baking sheet and gently squash with your fingers. Bake for 10 minutes until risen and golden. Carefully remove from the baking sheet with a palette knife and cool on a wire rack. Serve lightly dusted with icing sugar.

gluten-free walnut bread

January marks my gluten-free anniversary and at the end of this month, I will have been gluten-free for three years. So, I thought for this post that I would reflect on a few things I’ve learnt about being gluten-free along the way.

I’ve found that my love of cooking has really helped me accept the restrictions on my diet. It’s helped me to such an extent that I don’t often think of my diet as BEING restricted. I never really relied on ready meals and processed foods before so I don’t eat them now. I think if I had, then I would have found the transition much more difficult. Most meals cooked from scratch are naturally gluten-free anyway and those that aren’t can often be tweaked to be made so. If I’m ever feeling fed up (which isn’t often), I just pick up a copy of BBC Good Food magazine and remind myself of how much food I can still eat.

I’ve learnt that lots of people really aren’t clued-up with regards to alternative diets (and why should they be if it doesn’t affect them?) and that can lead to insensitive comments. I was talking to someone not so long ago about my diet and she remarked, “It sounds ghastly!” I really resented it. I felt like shouting, “Don’t say that! Take a look at my blog! Does my life look ghastly to you? Look at all the scrummy food I eat!!!!!”

I’ve been blogging now for just over a year and I LOVE IT! I wish I’d started it sooner. It’s made me much more creative than I ever thought I could be because I’m always thinking up new things to try and new ways of doing them. I don’t like being given ‘no’ for an answer and if there isn’t an immediate solution for how to achieve something, I’ll sit down and figure it out.

Linked with blogging has been the discovery of a vibrant gluten-free community in the Twittersphere. I felt very isolated before I joined Twitter. I didn’t know anyone who ate like me. It was great to ‘meet’ people who have the same dietary issues as me and who understand what it’s like. There is always an interested/sympathetic ear and a lot of active tweeters also have blogs. Check out my links page for my favourites.

I’ve come to accept that some gluten-free foods will not be exactly the same as their glutenicious counterparts, such as bread. Gluten-free bread does not have that tender candyfloss softness and lightness that you find in wheat bread. I’ve learnt not to expect it and I’m no longer disappointed when I don’t achieve it – I appreciate gluten-free bread for what it is: fresh homemade gluten-free bread is most definitely not the weird-tasting cardboard that a lot of people would think: it’s fragrant and delicious with a rustic texture.

I shied away from making bread for a long time and had some notable disasters in the early days. I almost gave up but I don’t like being beaten and I’ve enjoyed the intellectual challenge. I’ve also been spurred on by the fact that I’m really not keen on that brand of gluten-free bread that everyone raves about. I find that it dissolves into a gluey mass in my mouth and clogs my teeth. If you haven’t already, do check out my recipes for flatbread wraps, sunflower and linseed loaf, focaccia with rosemary and sea salt and stromboli. I’m currently working on recipes for tortillas, pitta breads, schiacciata (traditional Tuscan flatbread) and croissants for this blog and LiveGlutenFree has just published my latest recipe for them:

naturally gluten-free cheese and chilli mini cornbreads

Naturally gluten-free cheese and red chilli mini cornbreads

This walnut bread has a beautifully nutty flavour, has a wonderfully domed top (it won’t look like it’s risen much when you come to put it in the oven but it continues to rise whilst baking) and it slices cleanly. I’ve found with homemade gluten-free bread that when toasting, it takes a little longer than normal bread. Also, it’s much damper (listen to it sizzling in the toaster!), which I put down largely to the egg content, although I think the psyllium also has a part to play. After it has been toasted, it pays to allow the steam to escape for a few minutes before buttering to avoid it going mushy. I just leave it in the toaster for a few minutes. In the past, I’ve advocated freezing gluten-free bread, but I’m no longer convinced of its suitability: I think the ice crystals make it too wet and it goes a bit claggy, even when toasted. I’ve started making smaller loaves which I use up by toasting from Day 2 onwards.

gluten-free walnut bread 2

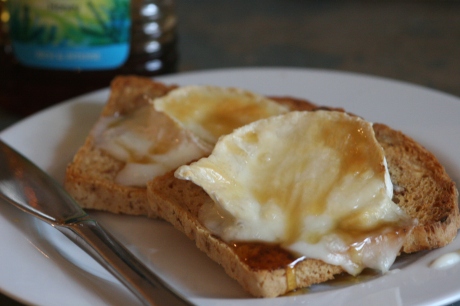
Serving suggestion: Toasted gluten-free walnut bread with grilled goat’s cheese and honey

Gluten-free walnut bread

Makes 1 small loaf

4 tsp psyllium husk
4 tbsp cold water
100g gluten-free plain (all-purpose) flour
80g gluten-free brown bread flour*
100g potato flour
12g tapioca flour
2 1/2 tsp caster sugar
1 1/2 tsp gluten-free baking powder
Heaped 1/4 tsp Vitamin C
Scant teaspoon fast-action yeast
1/2 tsp salt
50g walnuts, coarsely chopped
1 egg white
1/4 tsp xanthan gum
50ml warm milk
250ml warm water
25g butter, melted

You will also need an electric whisk, a 1lb loaf tin and a couple of supermarket carrier bags or a large plastic bag.

Mix the psyllium husk with 4 tablespoons (60ml) of cold water in a small bowl or mug and give it a good stir. Set aside.

Sift the flours, sugar, baking powder, Vitamin C and yeast into a large bowl. Give it all a good mix with a balloon whisk and then add the salt and chopped walnuts. Give it another stir to evenly distribute the nuts then make a well in the centre.

In a scrupulously clean bowl, whisk the egg white with an electric whisk for about 20 seconds until it becomes light and frothy. Sprinkle over the xanthan gum and continue to whisk until the egg becomes white and marshmallowy. BE VIGILANT! The egg white will suddenly take on a life of its own and will start to swarm up the beaters. To avoid fouling up the motor on your whisk, make sure to withdraw the beaters and the egg white will swarm back down them again.

Give the psyllium husk a good stir. It should have become a solid jelly. Give it a good stir and scoop this into the well in the flour mixture. Then pour in the milk, water, melted butter and egg white. Stir the liquids into the dry ingredients with a loose folding motion until you have a very wet and sticky batter. Scoop the batter into your lined tin and smoothe the surface with an oiled spatula or palette knife. Form a tent over the tin with the carrier bags and leave to rise at room temperature overnight (for about 12-14 hours).

When you are ready to bake the bread, preheat the oven to 190°C (my oven is fan-assisted, so adjust accordingly). Bake the bread for 10 minutes, then lower the temperature to 180°C and continue to bake for another 30 minutes.

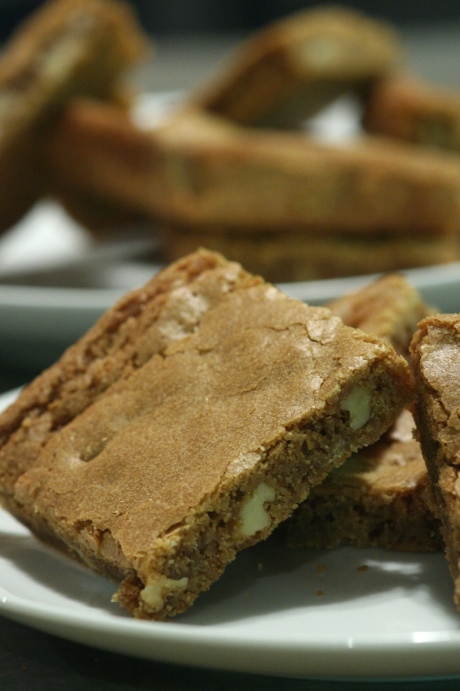
Gluten-free coffee and walnut blondies

I had a yen for a coffee and walnut combo the other day. In a cake, it has to be my favourite one of all time. It is the doyenne, paper doily and all, of the village fête cake stall. (I hear Middle England gasping, affronted, as I wantonly overlook the Victoria sponge…) Now I’m going to say something extremely controversial and I’ll probably get shot down in flames, but I really can’t understand why people get so worked up about a Victoria sponge sandwich. It must be one of the most pedestrian cakes ever. It’s nice enough but nothing to write home about. (I appreciate that this is tantamount to treason. I’ve totally messed up my chances of being admitted into the hallowed ranks of the Women’s Institute now…)

I think also that my sudden craving for coffee and walnut has something to do with the fact that I took myself off coffee a couple of months ago. I’d read a few reports which suggested that in people with coeliac disease/gluten sensitivity, the body may confuse the proteins in coffee with gluten and cause a reaction. I decided to come off it and see if it made a difference. I didn’t seem to feel any better (or any worse, for that matter).

I was in a branch of Caffe Nero with my friends and our toddlers. I had intended to have a hot chocolate but, whilst they were happy to say that it had no gluten-containing ingredients, they were also quick to state that it had been produced in a factory blah blah blah. (Am I the only one who finds this REALLY frustrating?!??) Anyway, the queue was building behind me and I didn’t want to cause a fuss, so I ordered a decaffeinated cappuccino.

And boy, did I live to regret it! The tummy pains started about half an hour later and I felt ropey for the rest of the afternoon and evening. So, even though I didn’t appear to feel better when I came off it, going back on to it made me feel ill.

So, why am I baking with coffee? Because I’m not convinced that in my case it is cross-reaction. My symptoms weren’t my classic ‘glutened’ ones – I didn’t get a headache or any joint ache or any other flu-like symptoms. My tummy just didn’t feel right which, ironically, is not how I usually suffer. I’m not sure what it was, exactly. Perhaps the coffee’s acidity: it was rather strong and bitter.

Anyway, I’ve cooked with it and haven’t had a reaction. I would be really interested to know if anyone else suffers with coffee or avoids it altogether?

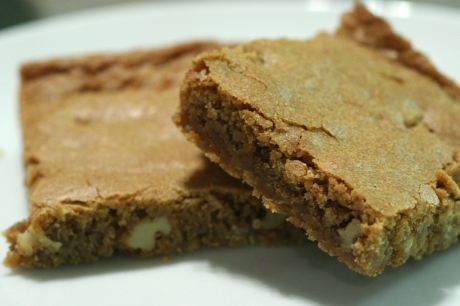
Gluten-free coffee and walnut blondies 2

Gluten-free coffee and walnut blondies

These are blondies in the American sense of the word, meaning that their main ingredient is brown sugar. In Britain, we tend to reserve the term for a brownie made out of white chocolate. This is, however, actually still technically a brownie. Even though it isn’t brown…

Makes 12 blondies

1 tbsp instant coffee
100g butter, melted
190g soft light brown sugar
1 egg
120g gluten-free plain (all-purpose) flour
20g tapioca flour
1/2 tsp gluten-free baking powder
1/2 tsp xanthan gum
1/8 tsp bicarbonate of soda
50g walnuts, coarsely chopped

You will also need an electric whisk and a 23cm x 20cm x 4cm non-stick rectangular cake tin lined with greased baking parchment.

Preheat the oven to 180°C (my oven is fan-assisted, so adjust accordingly). Dissolve the instant coffee in 1 tablespoon of boiling water and set aside to cool.

Whisk the butter and soft light brown sugar in a large mixing bowl until they are well combined. Add the coffee and the egg and continue to whisk to incorporate.

Sift the flours, baking powder, xanthan gum and bicarbonate of soda into the bowl. Mix well until you have a light brown, sticky batter. Fold in the chopped walnuts and pour into the cake tin. Smooth flat and bake for 20 minutes or until the surface is shiny and a toothpick comes out clean when inserted into the middle.

Leave in the tin until completely cool before removing, peeling off the baking parchment and cutting into 12 portions.

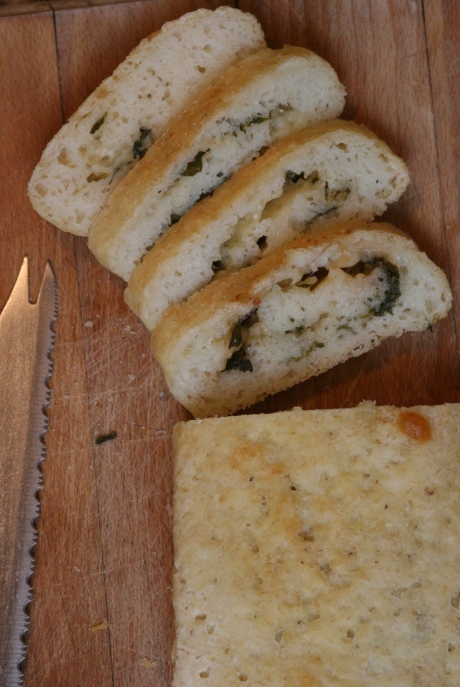
gluten-free stromboli (rolled focaccia stuffed with mozzarella and basil) 1

I have a confession to make. I have been idly playing around with my focaccia recipe for some months, changing a quantity here, adjusting a ratio there. It was never quite right so I didn’t post it. Then I discovered psyllium husk and I thought, “Maybe, just maybe, I’ll be able to crack it some time over the next few months.”

Then, Christmas came around and I was given a shed load of cookery books. Heaven. One of them, Gino D’Acampo’s Italian Home Baking, I flick through nearly every day. It is gluten porn in spades. There are only two (I think) gluten-free recipes in the whole book. The rest is gluten-a-go-go: wheat, semolina, rye, barley… Why would I put myself through this?!?!?! Why would a member of my family put me through this?!?!?!!?

Because I love it. Because I specifically asked for ‘normal’ cookery books, especially baking ones. I like to look my enemy right in the eye and very coldly and very calculatingly work out how I’m going to TAKE HIM DOWN (gluten is a ‘he’, don’t ask me why). Oh yes. I live to de-glutenise. No wheaty snack is safe from me.

And when I got to the recipe for stromboli, a focaccia which is stuffed with mozzarella and basil and then rolled, my mouth watered and my (left) eye squinted slightly as I imagined biting into crisp bread, oozing with hot herby cheese. I sized up my competition: my main problem was that I needed a reliable focaccia recipe first, never mind how I was actually going to roll the darned thing. I set to work and cracked it within a week.

So, that is my confession: my motivation to perfect my focaccia recipe was driven by gluttony and covetousness, pure and simple.

I feel so dirty.

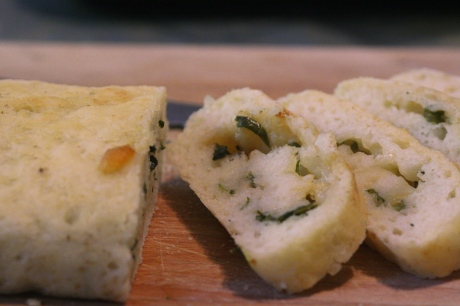
gluten-free stromboli (rolled focaccia stuffed with mozzarella and basil) 2

Gluten-free stromboli (rolled focaccia stuffed with mozzarella and basil)

According to Gino (I look at his book so often that we’re on first name terms now), this loaf is named stromboli (the stress on the first syllable, not the second) after the volcanic island just off the Sicilian coast because it originated in that area. It traditionally contains mozzarella and basil but I don’t see why you couldn’t pimp it up a bit with other stuff, like olives, sun-dried tomatoes or marinated artichokes. It probably wouldn’t be a stromboli then, but, who cares?

The aroma that comes wafting out of the oven as it’s baking is U-N-B-E-L-I-E-V-A-B-L-E. Have you ever seen a cat on a scratching post after it’s had catnip sprayed on it? That was a bit like me around the oven door this morning…

Makes 1 medium loaf

130g mozzarella, cut into small cubes
50g fresh Parmesan or Grana Padano, grated
3 tbsp fresh basil leaves, chopped
1 clove garlic, crushed
good grinding black pepper
5 tsp psyllium husk
5 tbsp cold water
215g gluten-free plain (all-purpose) flour
120g potato flour (starch)
15g tapioca flour (starch)
1 tbsp caster sugar
2 tsp gluten-free baking powder
1 tsp fast-action dried yeast
1 tsp salt
1/2 tsp Vitamin C
1 egg white
1/2 tsp xanthan gum
300ml lukewarm water
1 tbsp olive oil plus extra for brushing

You will also need an electric whisk and a 36cm x 12cm x 3cm rectangular loose-bottomed tart tin*.

Get the filling ready: place the mozzarella, Parmesan, basil leaves, crushed garlic and black pepper in a small mixing bowl and gently stir to combine. Set aside.

Prepare the tart tin: grease the tin and line with a strip of parchment wide enough to fit the base and long enough to go up the two short sides and overhang by a few centimetres either end (i.e. a strip approximately 50cm x 12cm).

Next, make up the focaccia batter by following my recipe here.

Place a piece of baking parchment 36cm high and about 70cm wide on your work surface and brush with oil. Spread the batter, using a well-oiled palette knife or spatula, to form a rectangle about 32cm high (leave a couple of centimetres between the edge of the batter and the edge of the parchment top and bottom) and about 20-25cm across in the middle of your baking parchment. The batter should be about 1cm thick. Avoid leaving holes in the batter, as the cheese will ooze out whilst baking and go brown.

Sprinkle the cheese mixture over the surface, leaving a border of a couple of centimetres all the way round. Now, you need to roll up the batter, Swiss-roll-stylee, using the baking parchment to help you. Start by lifting the left-hand long edge until the batter starts to roll onto itself. Keep coaxing the batter along by lifting up the edge of the parchment with one hand and nudging the base of the roll with the other. When the batter is completely rolled up, carefully roll it back to the middle of the parchment and lift it, paper and all, into the tart tin. Trim off any excess parchment so that the overhang is a couple of centimetres all the way around.

Place the tin on a baking sheet and cover with a large plastic bag (my supermarket carriers were too small so I ending up using a black dustbin bag). Leave to rise at room temperature for 12-14 hours.

Preheat the oven to 190°C (my oven is fan-assisted, so adjust accordingly). Before baking, remove the plastic bag and brush the surface of the loaf with olive oil. Bake for 10 minutes, then reduce the oven temperature to 180°C and continue to bake for another 30 minutes. The loaf is done when it is golden brown on the top and the base sounds hollow when tapped with your knuckle.

Remove from the tin and carefully peel off the baking parchment. Place on a wire rack to cool. Eat warm, either by itself, or to accompany soup, or with a selection of cold meats and salads.

* My tin has fluted edges: it really doesn’t matter because the parchment should stop this marking the bread.

gluten-free focaccia with rosemary and sea salt

I’ve been working on a gluten-free focaccia recipe for quite a while but I’ve never been completely satisfied with it. Usually gluten-free bread needs a certain amount of egg in it to help it to rise, but I’m always a little disappointed at how heavy and ‘cakey’ it can be, especially the day after baking.

Then, I discovered psyllium husk. I’d already read a bit about it and its pseudo-glutenacious properties on the internet, so I decided to give it a try. I managed to track a bag down in my local Natural Grocery Store, which is an Aladdin’s cave of organic, vegetarian and vegan foods, beverages, toiletries and cosmetics.

Psyllium husk is usually put into fruit and vegetable juices as a natural way of oiling the cogs of the digestive system and keeping everything moving, if you get my drift. When baking with it, you mix a little with water, give it a stir and leave it to sit for about 10 minutes. The resulting mixture, depending upon how much water you add, ranges from very gloopy and a bit like egg white to a speckly lump of jelly, and you just add it along with your other wet ingredients to your dry ones. I haven’t experimented with it extensively yet but I have a feeling that overall liquid volume probably needs to be increased when baking with it.

It’s quite expensive at £3.99 for 200g (working out at nearly £20 a kilo) but that 200g bag lasts quite a long time and the results it has when used in gluten-free baking are truly worth it. I’ve managed to cut down on the egg content by over half in this recipe and the resulting bread feels much lighter, less ‘cakey’ and much more ‘bready’.

gluten-free focaccia with rosemary and sea salt 2

Gluten-free focaccia with rosemary and sea salt

Please note that the top of the bread has a slightly grainy texture from the psyllium – it isn’t visible inside the loaf, however.

Makes 1 medium loaf

5 tsp psyllium husk
5 tbsp (75ml)  cold water
215g gluten-free plain (all-purpose) flour
120g potato flour
15g tapioca flour
1 tbsp caster sugar
2 tsp gluten-free baking powder
1 tsp fast-action yeast
1 tsp salt
1/2 tsp Vitamin C (I used Dove’s Farm)
1 egg white
1/2 tsp xanthan gum
300ml tepid water
1 tbsp olive oil + extra for brushing
couple sprigs fresh rosemary, leaves stripped
sea salt

You will also need an electric whisk, a 23cm x 20cm x 4cm rectangular non-stick cake tin, its base and short sides lined with one strip of greased baking parchment, and a couple of supermarket carrier bags or large plastic bags.

First, place the psyllium husk in a small bowl or mug with 5 tablespoons (75ml) of cold water. Give it a good stir and set aside while you measure out the other ingredients.

In a large mixing bowl, sift all the dry ingredients (apart from the xanthan gum) and give them a good whisk with a balloon whisk to make sure they are thoroughly mixed.

In a scrupulously clean bowl, whisk the egg white on high speed until light and foamy (about 20 seconds). Sprinkle in the xanthan gum and continue to whisk until the egg becomes white and marshmallowy. BE VIGILANT! The egg white will take on a life of its own and will start to swarm up the beaters. To avoid it fouling up the motor on your whisk, withdraw the beaters and it will swarm back down again.

Give the psyllium husk a good stir with a spoon. It should have become a fairly solid jelly. Make a well in the middle of the flour and pour in the psyllium jelly, the water, 1 tablespoon of olive oil and the egg white. Stir in the liquids, using a spatula, with a loose folding motion until everything is well-combined. The mixture should be quite wet and sticky.

Pour the mixture into the oiled cake tin and smooth flat with an oiled spatula or palette knife. Using well-oiled fingers, make deep dimples in the surface of the batter. Form a tent over the tin with a double layer of carrier bags (they always have anti-suffocation holes punched in them) or a single large plastic bag. Leave to rise overnight at room temperature for 12-14 hours.

When ready to bake, preheat the oven to 190°C (my oven is fan-assisted, so adjust accordingly). Lightly brush the top of the dough with olive oil and sprinkle on the fresh rosemary and sea salt. Bake the bread for 10 minutes then lower the temperature to 180°C and continue baking for another 30 minutes.

At the end of the baking time, remove the bread from its tin, carefully strip off the baking parchment and place it on a wire rack. Leave until completely cool before slicing.

gluten-free gruffalo chocolate birthday cake

My son turns two this week and his party was this afternoon. He had six of his little friends over to play and their mummies and daddies came too. We all had a wonderful time, chatting, eating and drinking while the little ones ran around us, playing and laughing.

I’ve been stressing over his cake for some time, wondering what I could do that would make his face light up. Over the last few weeks, he has become totally obsessed with The Gruffalo (or ‘Gluffalo’ as he says it!) by Julia Donaldson and Axel Scheffler. I don’t know if those of you from across the pond are familiar with The Gruffalo, but if you aren’t and you have young children, then you should definitely check it out. We have to watch the DVD at least twice a day and read the book about four times.

Once I’d decided that The Gruffalo was the way to go, I had to work out exactly how I would achieve it. It seemed pretty straightforward but I was still a bit daunted and I was completely prepared for the morning dash to Marks and Spencer’s to pick up a Percy Pig cake or somesuch. Luckily it wasn’t needed and I was really pleased with the result.

The pictures don’t really show the cake in its entirety and I also put it on a white plate which doesn’t help but it was a rectangular cake, covered with white regal icing with a picture of the Gruffalo taking up nearly all of it.

The recipe is a bit vague when I get to the decorating bit as we were making it up as we went along and we did have some buttercream and dark chocolate left over at the end.

gluten-free gruffalo chocolate birthday cake 2

Gluten-free ‘Gruffalo’ chocolate birthday cake

For the cake:

250g gluten-free self-raising flour
250g soft light brown sugar
30g cocoa powder
1 tsp gluten-free baking powder
250g butter, softened
4 eggs
2 tbsp milk

You will also need an electric whisk, a 23cm x 20cm x 4cm non-stick rectangular cake tin, greased and lined with baking parchment.

For the icing:

375g icing (confectioner’s) sugar
185g butter, softened
45g gluten-free milk chocolate drops
1-2 tbsp milk
1 1/2 tsp vanilla extract
Orange marmalade or apricot jam – several tablespoons
454g packet of ready-to-roll regal icing
the darkest gluten-free plain chocolate you can find (I used 84% cocoa solids) – about 50g
gluten-free white chocolate – about 25g
Orange chocolate beans (I used Dr Oetker)
Green and purple gluten-free Smarties (sugar-covered chocolate buttons)

You will also need a picture of the Gruffalo, measuring about 20cm in height, a piece of tracing/greaseproof paper, a pin, an electric whisk and an icing bag with a 1mm and a 5mm nozzle (or homemade greaseproof paper cones that can be snipped to size).

To make the cake:

Preheat the oven to 160°C (my oven is fan-assisted, so adjust accordingly).

Sift all the dry cake ingredients in a large mixing bowl and then add all the wet. Mix with an electric whisk until everything is combined and you have a sticky batter. Pour the batter into the lined cake tin, smooth flat with a palette knife and bake for 35-40 minutes until the cake is well-risen and the centre springs back when lightly pressed. If in doubt, stick a skewer into the centre. It should come out clean. If specks of raw batter stick to the skewer, put it back in the oven for another 5 minutes.

Remove from the oven and allow to cool in the tin for 10  minutes. Then, remove from the tin, carefully turn upside down and peel off the baking parchment and leave on a wire rack to cool upside down.

To ice the cake:

Trace your picture of the Gruffalo with a (non-toxic) pen or pencil onto a sheet of tracing or greaseproof paper and set aside.

Melt the milk chocolate drops in a heatproof bowl over a pan of barely simmering water and set aside to cool slightly.

Place the butter in a mixing bowl and beat with a wooden spoon until soft and creamy. Sift about a fifth of the icing sugar into the butter and cream it in with a fork. When the sugar is all absorbed, add the next fifth and so on. Mix in the melted chocolate and vanilla extract and mix in with a wooden spoon. Add enough milk to obtain a spreading consistency: it will need to be fairly loose or it won’t stick properly and will take a layer of crumbs off the cake.

Carefully slice the cake in half horizontally and sandwich the two halves together with the milk chocolate buttercream (setting aside about a teacupful).

Melt the apricot jam/marmalade in a small saucepan, sieve (if necessary), and brush over the top and sides of the cake. This will help the regal icing to stick.

Roll out and cover the cake with the regal icing according to the packet instructions (the finished icing will be somewhat thinner than the 5mm recommended on the packet).

Carefully place your Gruffalo tracing on the top of the cake and use the pin to prick around the outline.

Melt the dark chocolate in a heatproof bowl over a pan of barely simmering water and set aside to cool slightly. Add about a tablespoon to the reserved milk chocolate buttercream and beat to combine. Place the remaining dark chocolate in an icing bag with a 1mm nozzle (or homemade greaseproof cone with the end snipped off) and pipe around the outline. Take this opportunity to add two small dots to the orange chocolate beans for the Gruffalo’s eyes. When the dark chocolate has set, pipe the milk chocolate buttercream (using the larger nozzle) inside the outline. Carefully spread and smooth the buttercream up to the edges using a knife that has been dipped in hot water (this will help prevent the buttercream lifting off the regal icing). Use the point of the knife to texturise the buttercream to make it look like fur.

Place the orange chocolate beans on the Gruffalo’s face to create the eyes. Halve the purple Smarties with a sharp knife and use to create the purple prickles down the Gruffalo’s back. Cut the green Smartie in half and place on the end of the Gruffalo’s nose to create his poisonous wart.

Melt the white chocolate in a heatproof bowl over a pan of simmering water. Allow to cool until of a mouldable consistency and use to form the Gruffalo’s tusks, horns, teeth and claws. We used the tracing as a guide to both form them and to place them on the cake.

Notes from the Ledge

The secret to balancing it all is...well, I'll tell you if I ever figure it out.

mygijourney

The rise of a health nut

gf and me

Gluten Free Recipes & Tips

Bunny Eats Design

Happy things, tasty food and good design

sensitive flour

Gluten-free cooking, baking, eating

Little Gal in the City

Live and Love with your whole heart

No wheat please, I'm allergic

This WordPress.com site is the cat’s pajamas

wetinkpresspublishing

Pre-publishing Services for eBooks and Print Publications

afra cooking

taking pleasure in all things food

colour me happy kitchen

Because there's more than one way to make a cake.

gluten free zen

Taking The Stress Out Of Gluten-Free Grain-Free & Dairy-Free Living

charuyoga

vibrant inspiring health career yoga

Pizzi e Fichi

Lo style del buon gusto

Fabulously Free From

Living Gluten Free, fabulously!

DO NOT feed the back packer!

A diary of my interests, my travels and my quest to find good Gluten Free food! donotfeedthebackpacker@gmail.com

Mix It Up & Make It Nice

Amateur baker with a passion for eating!

My Blog

Just another WordPress.com site

Growing Up Gluten Free

Rantings, recipes, and reviews

Southerners in the Great White North

Ken & Becca's Canadian Adventure

thebeautyofthewrittenword

Smile! You’re at the best WordPress.com site ever

How Janey Learned Russian

Formerly "College Russian"

travels around my kitchen

Just live, read, eat and travel!

Making myself useful

Striving for daily self-accountability

The Foodies

Traditional and New Recipes for All Food Lovers

Gluten Free Gus

Baking Joy Into Every Gluten-free Bite

An Orange Kitchen

A year of food adventures in my Boston kitchen